


saltyvagabonds
Saltyvagabonds
Destinations

Asia
Bali
Japan
Korea
Malaysia
singapore
Thailand
Vietnam
Europe
Germany
France
U.K.
North America
Canada
Mexico
Oceania
Polynesia
Micronesia
Hawaii
Guam
Indonesia
All Travel Blogs
Travel Tips
Planning
About us
usa
Destinations
Travel Tips
Planning
About us
All Categories
Travel Tips
Worldschooling
Digital Nomad
Travel Hacking
Travel with kids
Lifestyle
Military Travel
Packing
All Travel Tips
Tech


Travel Hacking with
Chase Points
Military Space A Flights
Guide


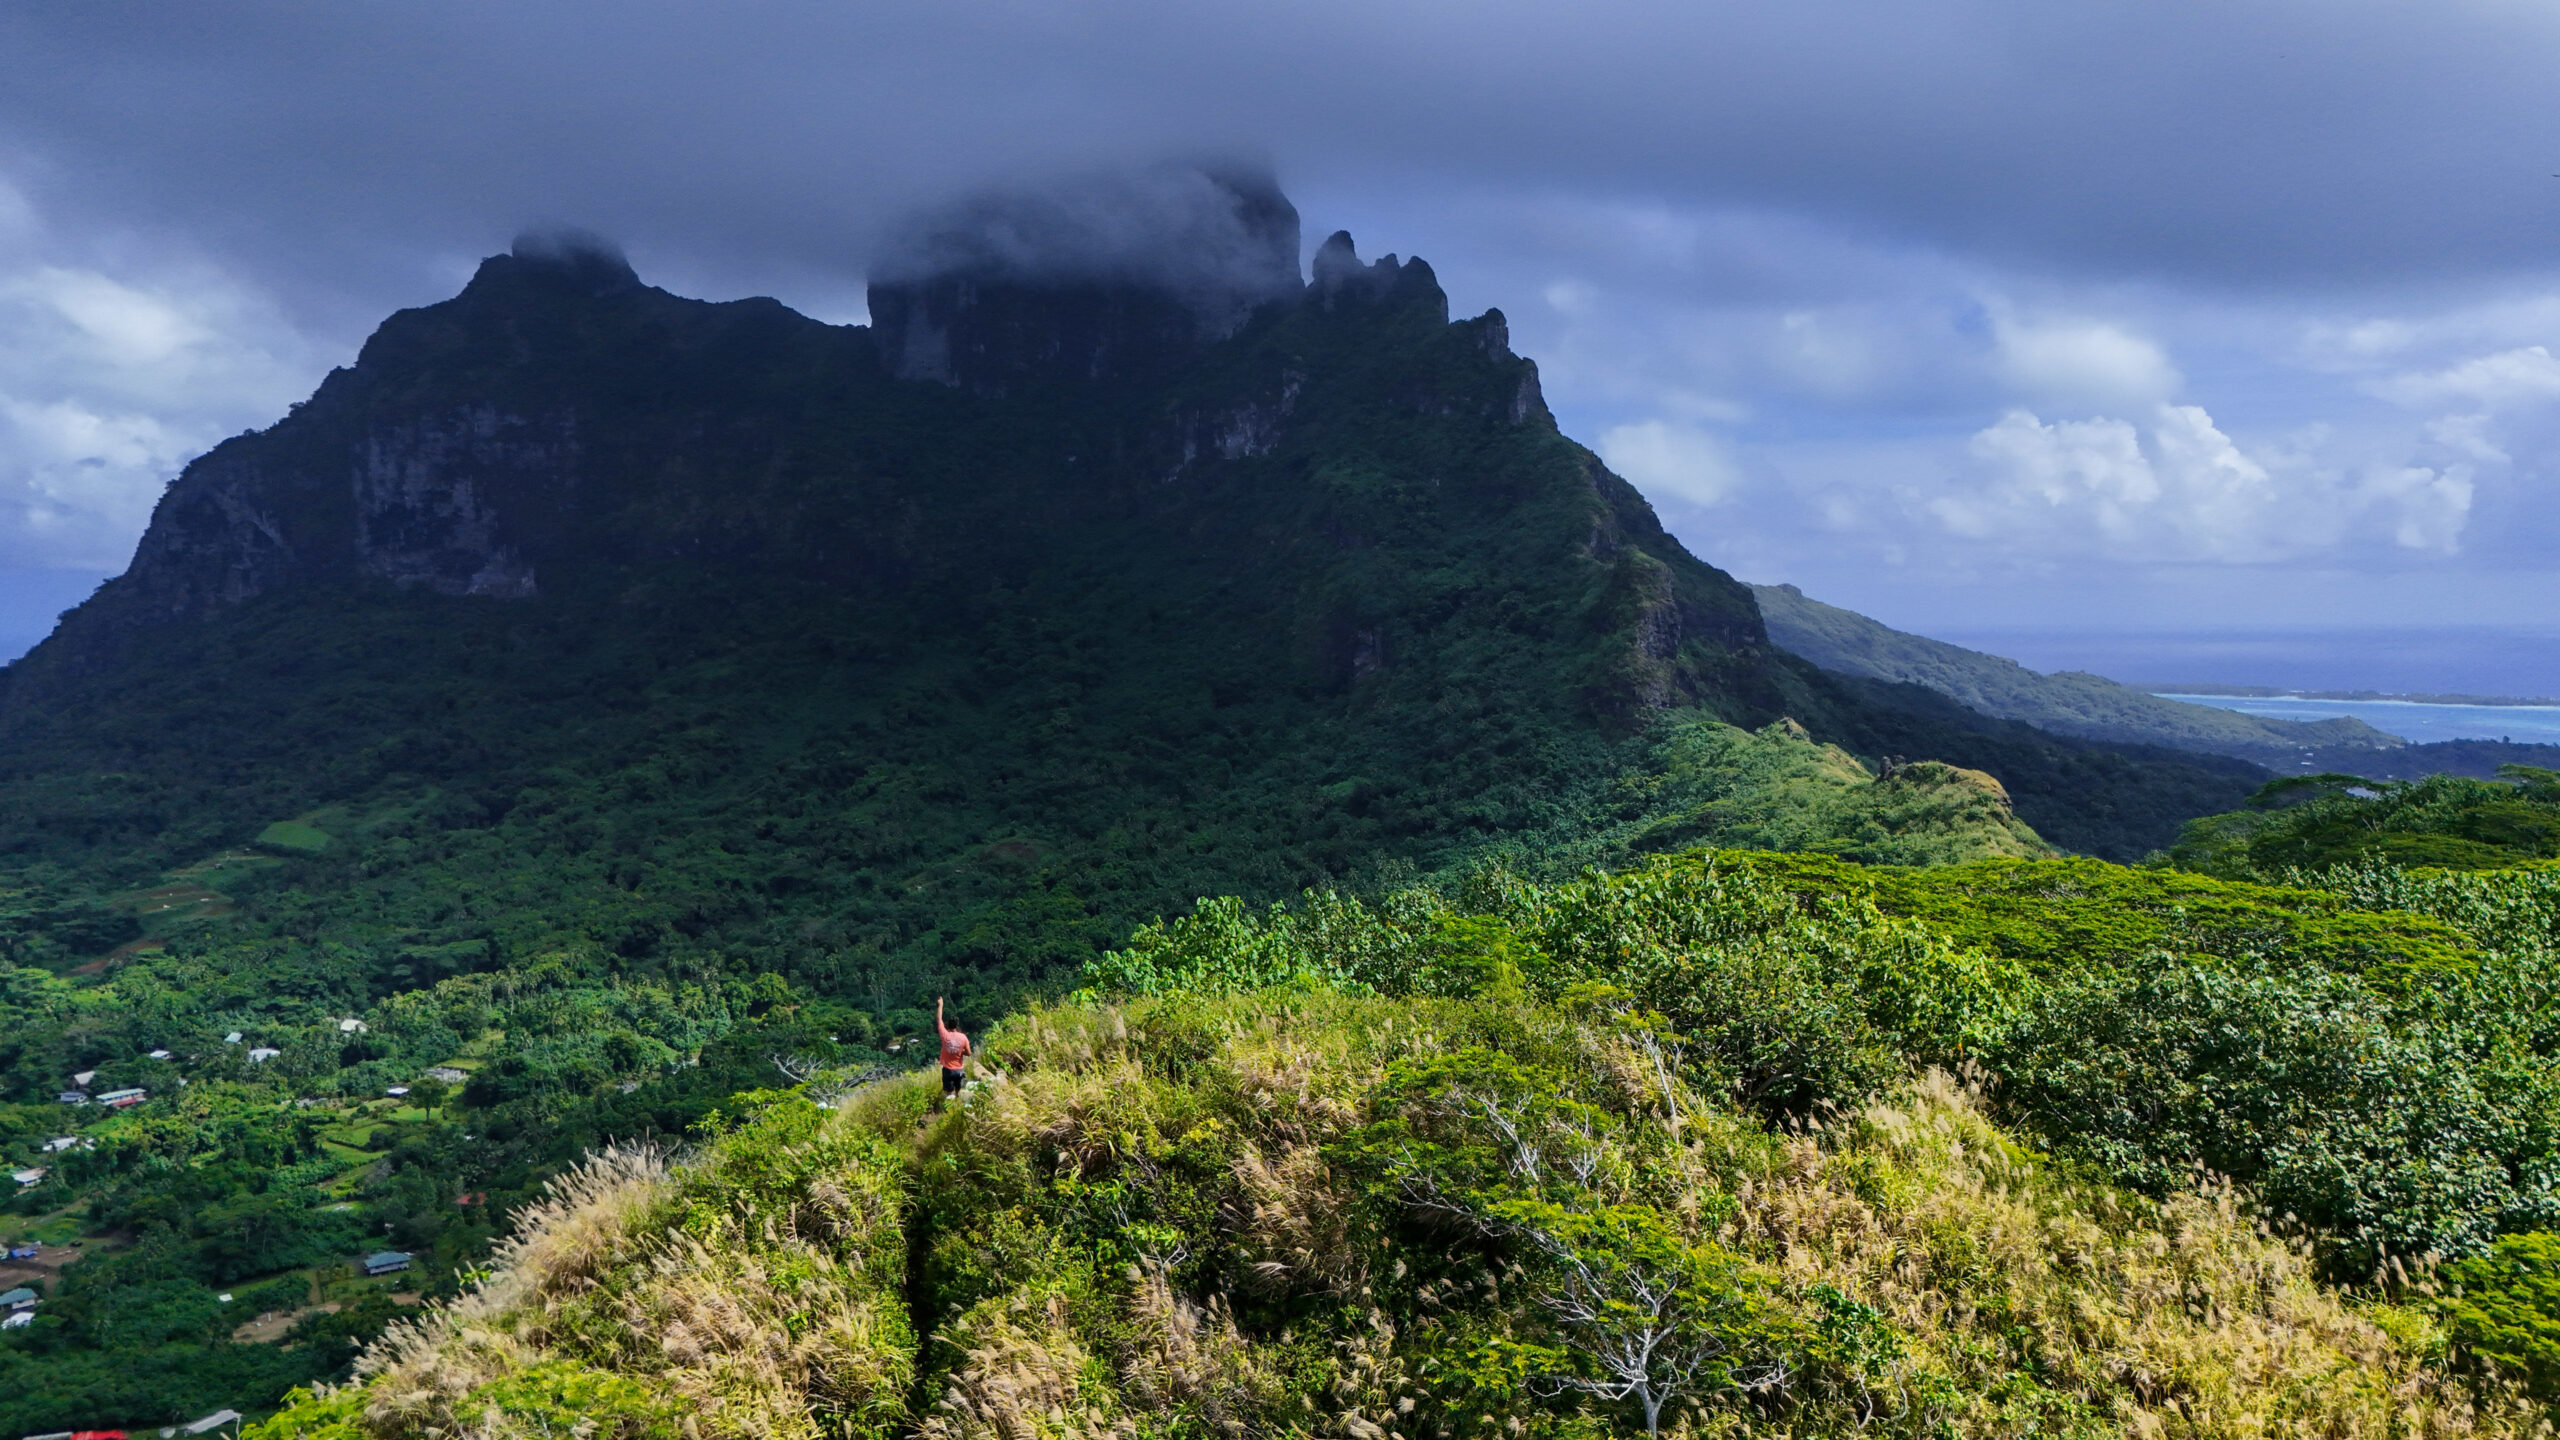

Hiking Mount Mata Pupu in Bora Bora: A Short Ridge Hike With Incredible Lagoon Views
Everyone staying at the resorts below had no idea this view existed. I was standing on top of Mount Mata Pupu looking down at all of it.

If you click on links we provide, we may receive compensation.


The Edit: This guide covers hiking Mount Mata Pupu in Bora Bora, a short but steep ridge hike overlooking Pofai Bay, Matira, and the lagoon. The trail climbs through ironwood forest, volcanic boulders, and a narrow ridgeline before reaching a small summit with panoramic views of Bora Bora’s lagoon and barrier reef. In this guide we share our exact route, where we parked, what the climb was like, and why the descent can be sketchy in the rain.

A Quick Hike Above Bora Bora
One afternoon in Bora Bora I decided to get off the beach and go for a hike.
The goal was originally to reach the ridge toward Arete de Matira, which runs south toward the famous Matira Beach area. On the map it looked like you could connect to the ridge from the service road that climbs up the mountain.
The plan was simple: park near the beach, hike up to the cell towers, connect to the ridgeline trail, grab a few photos, and head back down.
Like most adventures in Bora Bora, it didn’t exactly go according to plan. But it turned into one of the best viewpoints on the island. I liked it enough to come back a second time with the Fujifilm and the drone to do it properly.
Where I Parked
There are two good spots to park along Pofai Bay and both work fine.
The first is closer to the base of the service road, near a green electrical box. This is the more convenient option since you’re starting the climb almost immediately.
The second is a little further down near Roulotte Teare, a food truck and restaurant sitting across the street from the beach. It’s an easy walk from there to the trailhead and a good backup if the first spot is already taken.
From either spot the hike begins by walking up a steep dirt service road that climbs straight toward the mountains. You’re essentially following a tsunami evacuation route that doubles as the access road for the communications towers on the ridge.

The Steep Service Road to the Ridge
The first part of the hike is simply climbing the service road.
It’s not paved well and feels more like a mix of dirt, gravel, and rough concrete sections. A four-wheel-drive vehicle can make it up, but I wouldn’t recommend trying it in a regular car. The road gets progressively rougher the higher you go, and past the switchbacks it becomes genuinely steep. High clearance 4WD only.
About halfway up I passed the security guard for the tower area driving up in a truck. He gave a quick wave and kept going.
A little further up there’s a house with two dogs that came running out barking. That’s pretty common on the island. The gate was open and they were just protecting their property, but it definitely keeps you alert when you’re hiking alone. Face them, hold your ground, and keep moving.
On the second hike there were workers placing wood forms along the last few hundred feet of the road, which looked like prep work to pour new concrete. It’s unclear whether they’re doing the entire hill or just that section, but the road conditions may improve over time as that work wraps up.
Eventually you reach the cell tower area on the ridge, which is actually one of the stops on the island’s 4×4 tours.


The First Viewpoint
When you reach the ridge near the towers, the views open up immediately.
From that point you can already see both sides of the island. Looking one direction you get the motus, overwater bungalows, and the lagoon turning shades of turquoise out toward the outer reef.
Looking the other direction you get the bay where ferries and cruise ships enter, the island where the Conrad Bora Bora sits, and the deep blue water stretching toward Matira.
It’s a pretty incredible vantage point on its own, and a worthy destination if you’re hiking with younger kids or just want the views without the technical section. You can turn around right here and still feel like the hike was completely worth it.


The Private Road Surprise
At the end of the service road there’s a sign marking a private driveway. It doesn’t explicitly say keep out, but it’s clear the road leads to a private home further up the ridge.
On the map it looked like this road might connect to the Arete de Matira ridge route that heads south, but reaching it would likely mean crossing private property. And sometimes AllTrails isn’t perfectly accurate, so there’s no guarantee that route actually connects the way it appears on the map.
Rather than risk trespassing, I decided to head the other direction and explore the trail that disappears into the forest. That path leads toward Mount Mata Pupu.
Entering the Forest
Right when you enter the trees there’s a strange sight. Hanging from a tree was what looked like a punching bag. Nearby was a tent where a guy appeared to be living or camping. He saw me coming up the trail and threw up a quick shaka. I returned it and kept going.
From there the trail becomes much more natural. You’re immediately inside thick tropical forest with a heavy canopy overhead. The path is easy enough to follow but feels like a jungle trail, nothing maintained. The ground was already muddy from rain the day before.

Volcanic Rocks and Ironwood Trees
As you climb higher the trail weaves through volcanic boulders and dense stands of ironwood trees. These trees are tall and old, with trunks that feel like they’ve been there a long time. The terrain starts to feel very similar to hiking trails in Hawaii. As you gain elevation the vegetation shifts and the boulders get bigger.
At one point there’s a small side trail branching off to the right. It’s worth taking. Follow it out and it leads to a fantastic overlook facing east, where you can see the island of Taha’a in the distance, the reef below, and large sections of the lagoon. You can even spot areas where lagoon tours stop for snorkeling and motu picnics.
This east-facing overlook is also a great stopping point for families with younger kids. The views are impressive and you don’t need to go any further to feel like you earned them. The section that follows is where the trail gets significantly more serious.

The Ridge Trail
Back on the main trail the route continues along the spine of the mountain. At this point you’re clearly walking a ridge, with both sides dropping away. It’s not sheer cliffs, but you definitely don’t want to slip off the trail. The foliage is everywhere and the path winds through it, eventually opening into more exposed terrain.
On the second hike I passed a girl coming down as I was heading up, and later a group of five on their way up as I was coming down. They asked how much longer. I gave them an honest estimate and warned them that if rain starts, the descent gets slippery fast and feels a lot more serious than the way up. They appreciated it.
Then the real climbing begins.


The Scramble to the Summit
Near the top there’s a steep section of volcanic rock, roughly 30 to 40 feet of scrambling.
You’re climbing up using a large tree root that runs down a crack in the stone. It’s not technical rock climbing, but it absolutely requires your hands. There are no ropes installed here, though it would be easy enough to add one.
This is the point where I would draw the line for younger kids. Once you get past this root and rock climb, you’re committing to the push up to the actual peak. The terrain doesn’t get easier from here. If you’re hiking with little ones, the east-facing overlook earlier in the trail or the ridge viewpoint near the cell towers are both great places to turn around.
After the scramble the trail continues upward through grass and smaller boulders as you work toward the summit. At this point the ridge narrows to maybe 15 to 20 feet wide, possibly less. Grassy, a little muddy, and with minimal things to hold onto. You take your time.


Reaching the Summit of Mount Mata Pupu
The summit feels surprisingly spacious when you finally get there. It’s almost like standing on top of a volcanic spire, with open views dropping away on both sides of the island.
From the top you can see the lagoon and barrier reef, Matira and the southern beaches, the road circling the island, sports fields and houses below, and boats moving through the water. It’s one of those viewpoints where you suddenly realize how small Bora Bora actually is.
On the first hike I only stayed about five to ten minutes because I could see rain rolling in across the island. On the second hike I had more time, the drone, and the Fujifilm, and was able to do it properly.


The Sketchy Descent
Going down is the hardest part of this hike. By a lot.
Rain started falling on the first descent just as I began heading back. Wet volcanic rock becomes extremely slippery, so I took my time down-climbing the same sections I had climbed on the way up.
The root scramble especially required moving slowly and carefully. I was holding onto grass, rocks, whatever was available just to stay controlled on the slope.
By the time I reached the forest again I was completely soaked.
The key thing to know: going up feels manageable. Going down, especially in rain, is a completely different experience. The rocks get glassy when wet and there’s very little to catch yourself on. Watch the weather before you start and give yourself plenty of time to get back down before conditions change.

Trail Stats
| Stat | Details |
|---|---|
| Distance | 1.59 mi round trip |
| Elevation Gain | 685 ft |
| Moving Time | 49:50 |
| Steps | 4076 |
| Calories | 279 |
Stats from the second hike on March 12, 2026. Elapsed time reflects stops for drone shots, photography, and conversations on the trail. No car movement included.
The trail can also be accessed from the opposite side of the ridge, not just from the Pofai Bay approach.


Is the Mount Mata Pupu Hike Worth It?
If you want to see a different side of Bora Bora beyond the resorts, this hike is absolutely worth it.
The good news is there’s something on this trail for different experience levels. Families with younger kids can hike up the service road to the ridge viewpoint near the cell towers and get incredible views without any technical terrain.
If you want to push a little further, the east-facing overlook through the forest is another great stopping point with sweeping views of Taha’a and the lagoon.
For the full summit experience, you need to be comfortable with steep terrain, basic scrambling, and exposed sections along the ridge. Past the root and rock climb section, you’re committing to the peak, and the trail doesn’t get easier from there.
On the final push toward the summit there were moments where the only things to hold onto were grass and smaller plants along the slope, which keeps you very aware of how serious a fall could be.
This is not a groomed national park trail. There are no railings, no signs, and no safety infrastructure. It’s raw island wilderness.
If you’re experienced with hiking and take your time, the reward is one of the most incredible panoramic views in Bora Bora. I liked it enough to come back and do it twice.


| Quick Facts | Detail |
|---|---|
| Location | Bora Bora, French Polynesia |
| Trail Name | Mount Mata Pupu |
| Distance | 1.59 mi round trip |
| Elevation Gain | 685 ft |
| Moving Time | ~50 minutes |
| Elapsed Time | ~2.5 hours with stops |
| Difficulty | Moderate to challenging |
| Trail Type | Out and back |
| Trail Features | Ridge hiking, volcanic rock scrambling, lagoon views |
| Best Views | Bora Bora lagoon, Matira area, barrier reef, Mount Otemanu |
| Parking | Near green electrical box or Roulotte Teare, Pofai Bay |
| Trail Access | Can be reached from both sides of the ridge |
| Family Friendly | Partially — see family guidance notes in post |
| Trail Conditions | Muddy and slippery after rain |
| Best Time to Go | Morning or dry weather |


More Bora Bora Hikes Worth Adding to Your List
- Hiking in Bora Bora: Free Self-Guided Trails, Ridge Views, and When You Need a Guide
- Valley of the Kings Bora Bora: Finding the Sacred Banyan Tree Solo
- Mount Mataihua Hike Bora Bora: The Rope-Assisted Ridge Climb Most Visitors Never Attempt
- The WWII Guns at Faanui: Bora Bora’s Free Cannon Hike Most Tourists Skip
- Hiking Mount Mata Pupu in Bora Bora: A Short Ridge Hike With Incredible Lagoon Views
- Hiking Arete de Matira in Bora Bora: A Family Friendly Ridge With Incredible Views
Frequently Asked Questions About Hiking Mount Mata Pupu
Do I need a guide to hike Mount Mata Pupu?
No. This is one of the few hikes in Bora Bora you can do completely on your own. You don’t need to book a tour or hire a guide. Just park near the green electrical box or Roulotte Teare along Pofai Bay, follow the service road up to the cell towers, and pick up the trail from there. Having AllTrails or Strava downloaded with offline maps is helpful since cell service can be spotty on the mountain.
How hard is the Mount Mata Pupu hike?
Moderate to challenging. The service road section is steep but straightforward. Once you enter the forest it gets more technical, with a root and rock scramble section near the top that requires using your hands. The summit approach is narrow and exposed.
Some sources online call this an easy hike, but that’s not accurate. If you’re not comfortable with steep terrain and basic scrambling, turn around at the east-facing overlook or the ridge viewpoint near the cell towers. Both have incredible views and require no technical climbing.
Is the Mount Mata Pupu hike family friendly?
Partially. There are three good stopping points depending on who you’re hiking with. The ridge viewpoint near the cell towers at the top of the service road is accessible for most ages and already has stunning views of both sides of the island.
The east-facing overlook a bit further into the forest is another great option for families with younger kids. The root and rock scramble section is where we’d draw the line for small children, past that point you’re committing to the peak and the terrain doesn’t get easier.
How long does the Mount Mata Pupu hike take?
Moving time is about 50 minutes, but plan for closer to 2.5 hours if you’re stopping for photos, taking in the views, or flying a drone. The trail is only 1.59 miles round trip but the elevation gain and technical sections slow things down considerably, especially on the descent.


Where do you park for the Mount Mata Pupu hike?
There are two good spots along Pofai Bay. The first is near a green electrical box close to the base of the service road, this is the most convenient since you start climbing almost immediately.
The second is a little further down near Roulotte Teare, a food truck and restaurant across the street from the beach. Both work fine.
What shoes should I wear for the Mata Pupu hike?
Proper hiking shoes or trail runners with good grip. The trail has volcanic rock, muddy sections, and a root scramble near the summit. Sandals or flip flops are not appropriate. The rock gets extremely slippery when wet, so tread matters a lot on the descent.
What should I bring on the Mount Mata Pupu hike?
At minimum bring water (at least a liter and a half), sunscreen, a phone with offline maps downloaded, and shoes with good grip. A sweat towel helps. If you’re planning to fly a drone or shoot photos at the summit, bring extra batteries. A light rain layer is worth having during rainy season since weather can change fast on the mountain.
Is it safe to hike Mata Pupu alone?
Yes, though go early and check the weather first. The trail sees other hikers, especially on weekends. The bigger risk is getting caught in rain on the descent, which makes the volcanic rock dangerously slippery. Start early, watch the clouds coming off Mount Otemanu, and give yourself plenty of time to get down before conditions change.
Can you hike Mount Mata Pupu during rainy season?
Technically yes, but with caution. I hiked it during rainy season and got caught in rain on the way down. Rain will significantly changes the experience. The root scramble and rock sections become very slippery when wet. If you’re going during rainy season, start early in the morning before afternoon showers build, and be prepared to turn around if rain starts.
Is Mount Mata Pupu the same as the Arete de Matira hike?
No, though the two are connected on some maps. The Arete de Matira ridge route runs south toward Matira Beach and is a separate hike. The service road up to the cell towers appears to connect to that trail, but the road ends at a private driveway.
AllTrails shows a connection that may not actually be accessible without crossing private property. Mount Mata Pupu branches off the other direction, into the forest from the cell tower area.
Is Mount Mata Pupu worth it compared to other Bora Bora hikes?
Yes, especially if you want a hike you can do independently without a guide or tour. The views at the summit are incredible. You can see both sides of the island, the lagoon, the barrier reef, Matira Beach, and Mount Otemanu all at once.
Most resort guests never even know this hike exists, which makes the summit feel like a reward. For a more technical challenge, Mount Pahia is the next step up but a guide is highly recommended. For something easier, the WWII Cannon hike is a good alternative.


Leave a Reply


Planning
Tips
Destinations
Oceania
North America
Europe
Asia
Bali
Japan
Korea
Malaysia
singapore
Thailand
Vietnam
France
U.K.
Germany
Canada
Mexico
usa
French Polynesia
Micronesia
Hawaii
Guam
Indonesia
All Travel Blogs
Destinations
Planning
Tips
Destinations
Travel Tips
Planning
About us
Hotels
via Booking.com


Car Rental
Book a Bus/Train/Transfer
Find Cheap Flights
Get ESIM or SIM Card
Easy Currency Exchange
Book Tours & Attractions
Get Travel Insurance
via Discover Cars
via Skyscanner
via 12Go
via Wise
via Viator
via Visitors Coverage
via SimOptions
Destinations
Planning
Tips
All Categories
Travel Tips
Worldschooling
Digital Nomad
Travel Hacking
Travel with kids
Lifestyle
Military Travel
Packing
All Travel Tips
Tech
